
The goal is to create a material for my AI that can shift between two states after an interaction.


- Fresnel – Textures facing the camera = 0 , Textures 90 degrees to the camera = 1 creating an edge fall off effect
- Screen Aligned UVs – Aligns a texture’s UVs based on the angle of the camera
- Panner – Pans a texture
Nodes are quite self explanatory and holding Alt and Ctrl gives more information so it’s more about practising the logic of creating materials than knowing what individual nodes do and how to use them.

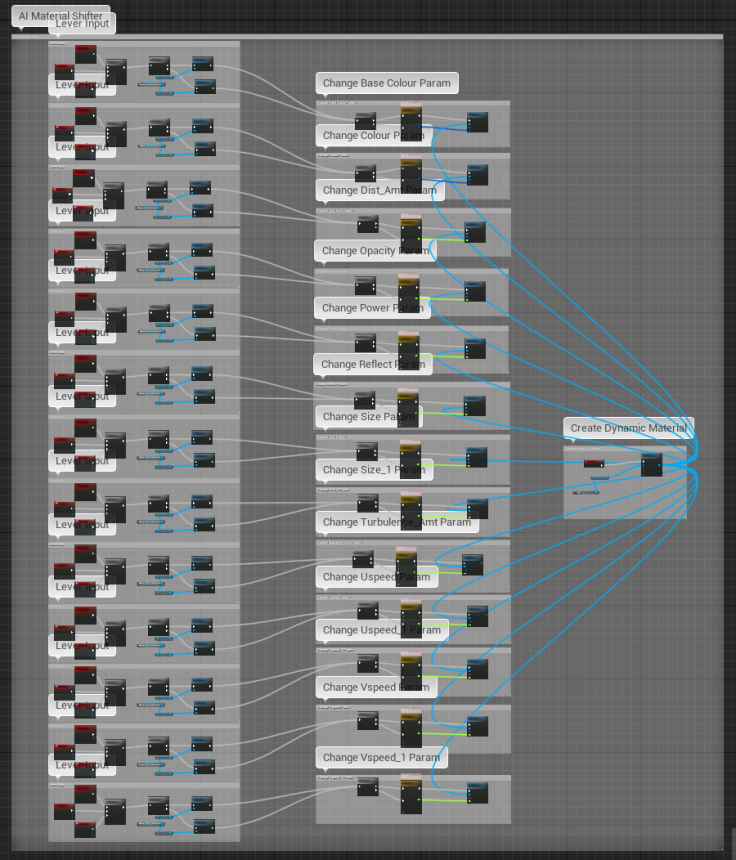
I quite liked this specific effect from DeepSpaceBanana’s ‘Turbulence’. From their notes perhaps the biggest thing was that you can create custom nodes. That’s extremely powerful, the MF_FloatNoise2D comment on the image below was created based off a custom node DeepSpaceBanana created and used to create this and a few other effects.


So I did my best to recreate their ‘Turbulence’ effect and combined them all together


I’m very happy with the result of this material, but I want to take it a bit further. I watched this Shaders training where they create a material reminiscent of Saurons Eye where the eye follows the player. My thought was that if I could make the pupil the shape of the AI I could use that to have the AI follow the player.
Didn’t go well, they didn’t go into great detail as to how they created the material but the Eye is made up of radius’s and things subtracted from each other, not a texture like I’d thought. I’ll look into how to make a model track a player soon…


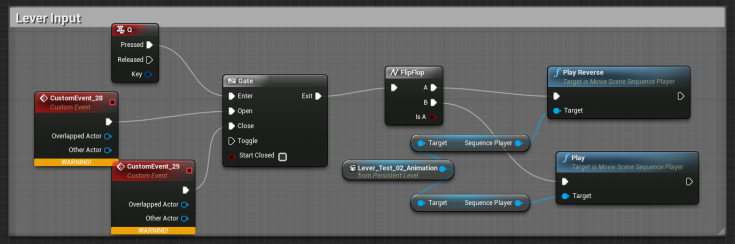
Since the AI has 2 states there has to be a way to get it to shift between those states but I was stumped so I talked with Steve and with his help we created a modular blueprint to animate between different parameter values which is perfect.

- FlipFlop – Toggles between giving output A or B after each consecutive input
- Dynamic Material – makes the material subject to change or Dynamic
- Timelines – changes a value (Float, Vector, Event or Colour) over time using a graph editor
This was dated and not very helpful but I found the matinee which has now been replaced with sequencer. More a little refresher.
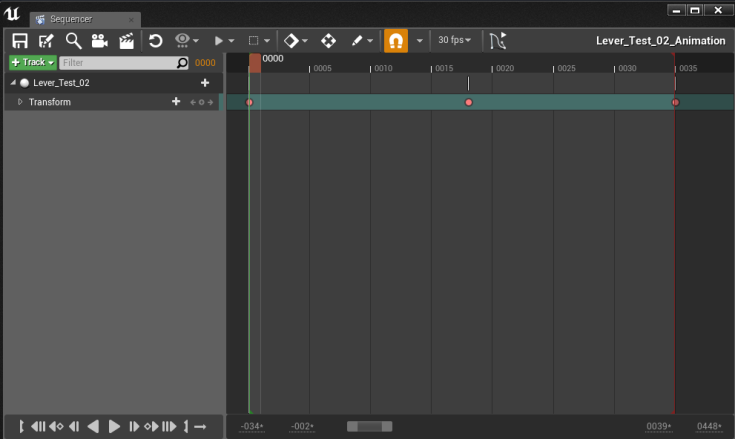
After I keyframed the Lever rotation I could reference the animation in the blueprint and kept following the above tutorial to create the rest of the blueprint
Then after hours of trouble shooting I duplicated the heck out of it and replaced every input key with a ‘Lever Input’ BP and created this monster

A 4 second gif to display everything I’ve done in a month… Animation in a nutshell…
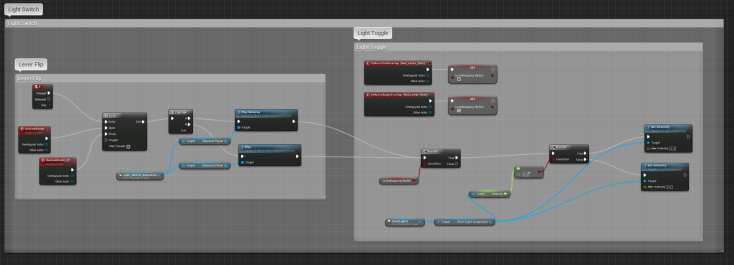
I took the ‘Lever Input’ and plugged it into an old test light switch I made ages ago and tada!

Toggl Reports
Week 8: https://drive.google.com/open?id=1cW_C_HsBmlGYEoCNrxg1UpT-48jH50KS
Week 9: https://drive.google.com/open?id=1F3oXsYzCWFBVmEGYcM41aVmI-dJOuQVx
Week 10: https://drive.google.com/open?id=1fDvuYBLnQxeIbLr6XANNTeDOnwooAvzN

Leave a comment